


What you will learn
- Winterize a landscape drip system by draining, isolating, protecting, and verifying, scheduled by the local first-freeze forecast, not the calendar, because water expands roughly 9% in volume when it freezes and any line that still holds water will crack.
- The blow-out air pressure you can safely push through a drip system is set by the lowest-rated fitting class installed: PN10 barbed lines (10 bar / 145 PSI static rating) cannot tolerate plumbing-grade 80 PSI blow-out without risking barb unseating or tubing rupture.
- Freeze behavior differs by fitting type because each fitting creates its seal differently. Barbs rely on tubing elasticity, compression fittings lock by ring deformation, and lock-nut fittings seal on a metal flare, so the cheapest connection in the system sets the upper limit of any winterization procedure.
- Component prep outside the dripline matters just as much as the drip tube itself: backflow preventers, filter housings, valves, solenoid manifolds, and controllers all need their own cold-weather steps.
- A 30-minute walk-through before the first forecast freeze is cheaper than a single spring callback to repair split mainlines, and a written checklist is the difference between crews that winterize the same way every year and crews that improvise.
Why Drip Lines Need Winterizing (And What Actually Breaks)
A landscape drip irrigation system looks like a long, low-pressure plumbing job with flexible polyethylene tubes and small barbed fittings. The temptation is to assume "drain the lines" is enough. It is not. Two factors conspire to make drip-system freeze damage disproportionately expensive.
The water-to-pipe volume ratio is high. Drip tube has a thin wall and a low-pressure operating envelope, so even a small mass of trapped water expands enough during freezing to split the tube wall or deform a fitting seal. Water's textbook volume expansion of approximately 9% understates the practical outcome: freezing water inside a sealed tube can generate localized pressures in the 100 MPa (1,450 PSI) range, many times the design pressure of any drip fitting on the market. The tube cannot contain that pressure; the tube splits.
Second, freeze failures are commonly buried. Drip tube is laid under mulch or shallow soil in a planting bed, and fittings are typically below grade. Split tubing or cracked fittings do not produce a geyser; they produce a slow leak that is not visible until the spring pressurization test, by which point the planting has already been damaged. The replacement cost is the sum of the irrigation repair plus the landscape reinstatement.
Therefore, the question "do drip lines need winterizing?" answers yes whenever the local overnight low reaches 0 degC (32 degF) for several hours; the procedure cost (labor plus optional insulation) is small compared to the cost of excavating and replacing a buried fitting in spring.
Key concept: Drip-system freeze damage is driven by expansion pressure, not by the ambient temperature alone. Even a single overnight low at 0 degC (32 degF) can be enough if the line holds standing water; conversely, repeated overnight lows at -2 degC (28 degF) cause no damage in a fully drained line. The protocol is therefore built around removing water from the system, not around heating components.
When to Winterize: Climate-Specific Timing Windows
The single most common winterizing mistake is using a calendar date. A calendar date is the right starting point, not the trigger. The right trigger is the local 10-day forecast: schedule the morning an overnight low at or below 0 degC (32 degF) is first predicted. This reflects the actual freezing risk for that season, which varies year to year by two to three weeks in temperate zones. The International Commission on Irrigation and Drainage (ICID) maintains regional freeze-design databases.
Climate by climate, the practical windows look like this:
- Cold continental climates (USDA hardiness zones 3 to 5): first autumn freeze is typically mid-October through early November. Winterization is a non-negotiable annual procedure, scheduled against the first multi-day forecast where overnight lows stay below 0 degC (32 degF).
- Temperate climates (USDA zones 6 to 7): first freeze is typically early November to early December. The procedure is still triggered by the first 10-day forecast freeze; a fully drained system does not refreeze during subsequent mild stretches.
- Mediterranean and subtropical climates (USDA zones 8 to 9): hard freezes are uncommon but not unknown. Winterization is defensive, run when the seasonal long-range forecast calls for an unusually cold winter, otherwise the gravity-drain fallback is used.
- Tropical and arid climates (USDA zones 10+): hard freezes are exceptional. Winterization is performed only in response to a forecast cold snap.
Because 9% water expansion has the same destructive effect in zone 4 and zone 9, the protocol is the same in both zones whenever a real freeze event is forecast; the difference is in how often the protocol runs.
Fitting Behavior in Freezing Conditions - Why the Component Matters
The cheapest connection in the system sets the upper-pressure limit for any winterization step. Because a blow-out event delivers air to every fitting and tube at once, the system performs only as well as its weakest class of connection. Three fitting classes dominate landscape drip work, and each behaves differently during freeze events.
How Barb Geometry Controls Freeze Failure Mode
Barbed fittings rely on the elastic recovery of the drip tube to keep them sealed. The barb is a raised ring on the fitting body; pushing the tube over the barb stretches the tube wall, which then presses back against the fitting body, and that mechanical back-pressure is the seal. Under freeze conditions, this design is the most vulnerable because the tube wall becomes less elastic as it gets colder (polyethylene embrittles below roughly -20 degC (-4 degF)) and any expansion of trapped water fights against the mechanism that holds the fitting in place. The most common freeze-related failure mode is the tubing pulling off the barb, invisible from above because the tube settles back into the soil after thawing.
The maximum blow-out air pressure for a barbed system is set by the cheapest barbed fitting in the system, not by the compressor. Most commercial barbs (PN10 / 10 bar / 145 PSI static rating) tolerate a regulated blow-out pressure of around 2.0 bar (29 PSI) without clamps, and manufacturer published maximums for specific lines, for example 3.45 bar (50 PSI) without clamps for 17mm Super Fittings, are the upper bound, never the working pressure. A practical target is 0.4 to 0.7 bar (6 to 10 PSI) for typical residential drip systems.
Compression Fittings and Freeze Recovery
Compression fittings use a tightening nut to deform a compression ring against the pipe wall; the seal is mechanical (the ring grips the pipe) and hydraulic (the ring compresses the pipe wall against the fitting body). Freeze events affect the seal in two ways: the ring expands as trapped water freezes, briefly lifting the seal; and when the ice thaws the ring does not always return to its original position, so the next pressurization cycle leaks. The visible symptom is a wet spot that appears only when the system is running.
Compression fittings are not a freeze-resistance upgrade over barbed fittings; they are a different risk profile. In frost-tolerant designs, compression fittings on submains (above the frost line) and barbed fittings on driplines (below the frost line) is common. The INOVATO Drip Line System Fittings technical article documents the matching procedure that keeps compression fittings above the frost line.
Lock-Nut Fittings and Metal-to-Metal Seals in Cold Climates
Lock-nut fittings (also called flare × lock-nut fittings) are the most freeze-resilient class because the seal interface is metal-to-metal, with a soft gasket (EPDM or NBR) as the seal element. The metal-to-metal interface does not change dimension appreciably as water freezes and thaws. The soft gasket takes a small set after each thermal cycle, which is why lock-nut fittings are specified for recycled-water systems where the chemistry is harsher than potable water.
For cold-climate systems, the typical practice is lock-nut fittings on the mainline manifold, compression fittings on submains above the frost line, and barbed fittings on driplines below. The INOVATO Super Fittings product line catalog covers the mainstream 17mm commercial barb range.
Practical guidance: When the installed system mixes fitting classes, treat the lowest-pressure-rated class as the controlling limit for any air or water action. A PN10 barbed system with PN25 lock-nut manifolds should be winterized at PN10 air pressures, not PN25 pressures; the barbs will move first. Cataloging the installed fittings is a one-time setup cost that pays back every winter.
Pre-Winter Inspection Checklist for Landscape Drip Systems
Inspection should happen one to two weeks before the first forecast freeze, so any small problems (a slow barb leak, a clogged emitter, a cracked filter bowl) can be fixed before winterization begins. Inspection is also when you confirm which fitting classes are installed, which determines the rest of the procedure.
- Walk the system and map every fitting by class (barbed, compression, lock-nut). Take photographs that reference zone and station numbers.
- Walk every emitter and dripper. Note any that are clogged, broken, or visibly offset from the plant root zone. Plan replacements for spring startup.
- Open the filter housing and inspect the screen or disc filter. Clean or replace the element; debris left in the filter becomes a clog during winterization.
- Verify the pressure regulator output matches design pressure (typically 1.0 to 2.0 bar (15 to 29 PSI)); an unregulated failed regulator is a freeze-failure multiplier for PN10 barbed lines.
- Test each solenoid valve manually. A solenoid that does not open under manual bleed is a winter hazard; plan a replacement.
- Mark any above-ground component (filter, regulator, solenoid manifold, backflow preventer) that needs insulation with a colored flag so the winterization crew finds them quickly.
Each step is also a brief notes entry on the irrigation as-built drawing. After three to four winters, the cumulative notes become an operational history that new crew members can read.
Step-by-Step: How to Winterize a Landscape Drip Irrigation System
The procedure varies by region and components, but the core four-stage sequence (drain, isolate, protect, verify) is universal. A residential system takes one to two labor hours; a commercial system with multiple submains takes three to six hours per acre.
Manual Drain Method for Mild-Frost Regions
For regions that experience only occasional frosts and where manual drain valves are accessible at every low point, manual draining is the simplest step. Shut off the irrigation water supply, open the master valve's downstream test cock (where present), then open every zone valve manually until water stops discharging. Walk the line in zone-valve order so low points drain last; this lets gravity do the work without reversing flow. Cap every open dripline end to keep debris out. Manual draining is sufficient when line geometry guarantees all water can leave downhill; for uphill segments, the air blow-out method is required.
Compressed-Air Blow-Out for Repeated-Freeze Regions
For regions that experience repeated hard freezes, the blow-out method is the standard. Connect a regulated air compressor at the hose-end or designated blow-out port. Open a single zone, set the regulator to the maximum pressure the lowest-rated fitting in the system allows, and cycle the zone for 30 to 60 seconds until water stops discharging. Do not exceed the manufacturer's published maximum; for the 17mm Super Fittings product line it is 3.45 bar (50 PSI), and a typical PN10 barbed drip system sits well below that. The Irrigation Association recommends against using higher air pressures than the lowest-rated fitting in the system can tolerate. Stop immediately if any tube visibly moves, expands, or unseats.
Blow-Out Procedure: Air Pressure Limits by Fitting Class
The single most common winterizing injury to the system (rather than to the operator) is over-pressurization during blow-out. Plumbing-grade blow-out tools designed for above-ground sprinkler systems can deliver 80 PSI (5.5 bar) or higher; using such a tool on a drip system can exceed the design pressure of every fitting in one stroke. The convention is to regulate the compressor down to the lowest of the published fitting maximums.
| Fitting class | Static hydraulic rating | Practical blow-out upper limit | Notes |
|---|---|---|---|
| PN10 barbed | 10 bar / 145 PSI | ~2.0 bar / 29 PSI | Lowest limit in most drip systems. Stop on visible tubing motion. |
| 17mm commercial barb (e.g., 17mm Super Fittings, no clamps) | Manufacturer-published at most 3.45 bar / 50 PSI | 2.5 bar / 36 PSI | Verify with the specific product spec sheet; with clamps fitted, the lower barb pressure limit remains the controlling factor. |
| PN16 compression | 16 bar / 232 PSI | 3.5 bar / 50 PSI | Common on submains; do not exceed the lower barb limit if the dripline uses PN10 barbs. |
| PN25 lock-nut (brass) | 25 bar / 363 PSI | 5.0 bar / 72 PSI | Used on mainlines; controlling factor for the system stays at the lowest downstream class. |
Two non-mechanical limits are easy to miss. First, water-hammer transients during valve closure can briefly double the static pressure, so a system operating at 4 bar can see short transients of 8 bar; the maximum blow-out pressure should be set below the worst-case transient. Second, cold air at the regulator outlet is denser than at room temperature; a regulator set indoors may overshoot the design pressure once the air cools to outdoor winter temperatures, so a 10% allowance for thermal shrinkage of regulator springs is appropriate.
What to Do for Systems That Cannot Be Blown Out
Some systems are not amenable to compressor blow-out (gravity-fed systems with no accessible air connection, building-mounted systems where air inlet would push water into occupied space, or coastal-frost sites where the operator does not own a compressor). For these, the fallback is gravity drainage combined with periodic checks.
The fallback procedure: shut off the irrigation water supply at the meter; open all manual drain valves at every low point; remove end caps and emitter outlet caps in turn, walking the line; allow gravity to discharge for at least 15 minutes per zone; reinstall the caps before the next cold snap. Periodic checks during cold snaps confirm whether air pockets have refilled from condensation or capillary wicking of soil moisture. The trade-off is certainty (a fully blown-out system) for portability (no compressor required).
Component-by-Component Winter Prep (Filters, Valves, Backflow Preventers, Controllers)
The drip tube is one of several components; each has its own procedure and risk profile.
Filter Housing
The filter housing is one of the largest water-trapping components above ground. Open the housing drain and discharge any water in the bowl; remove the screen or disc element and store it indoors; reinstall the housing bowl hand-tight to keep debris out. The Irrigation Association recommends that filter bowls be drained completely in any climate that sees more than three nights below 0 degC (32 degF) per season, because the bowl's curved surface concentrates freeze stress at the lowest point.
Valves (Manual and Solenoid)
Manual valves can be left in place if above the local frost line and oriented so gravity drains them when opened. Solenoid valves are more vulnerable because both the coil and the body retain water. Wrapping the solenoid body in foam insulation is sufficient for regions with overnight lows of -2 degC (28 degF) and warmer; in colder regions, remove the solenoid coil and store it indoors.
Backflow Preventer
The backflow preventer is the highest-priority above-ground component because it sits above grade, near the point of connection, and contains a relatively large trapped volume of water. Cover with a foam insulation cover or UL-listed heat tape; do not seal the cover airtight, because trapped condensation causes corrosion and may itself freeze. Open the test cocks to release additional water. In regions where overnight low temperatures regularly stay below -7 degC (20 degF) for weeks, the safer option is to remove the backflow preventer entirely and store it indoors; this typically requires a licensed plumber and a re-test on reinstall.
Controllers
Set the controller to rain-off or off mode. Disconnect power to pedestal-mounted controllers where local code allows; battery-backed controllers can keep program memory but stop solenoid output. Remove nine-volt backup batteries if the controller is left in a non-conditioned location over winter, because cold shortens battery life and a failed battery often leaks electrolyte that damages the circuit board.
Spring Startup Verification - Catching Freeze Damage Early
The first 30 minutes of the spring startup is the diagnostic window for freeze damage. Pressurize the system slowly (master valve half-closed, then fully cracked), then walk each zone while running, looking for three signs:
- Geysers at fittings: split compression fittings manifest as a tight geyser, typically at the body of the fitting rather than at the connection to the tube. Cut out the fitting and replace.
- Wet spots along the dripline: split dripline appears as a localized wet area on the surface, even when the rest of the zone shows uniform emitter wetting. Cut the section out and replace with a coupling.
- Pressure that drops within 60 seconds: a cracked solenoid manifold or split mainline will depressurize the zone within the first minute. Shut the zone off and walk it for visible leaks before continuing.
Run each zone for at least five minutes so pressure-compensating emitters stabilize. Compare zone flow to the prior year's baseline; a 10 to 15% drop is normal age-related drift; a 30% or larger drop indicates a freeze-failure leak. A bucket-and-stopwatch measurement at a representative emitter is sufficient baseline data.
Buying and Sourcing for Cold-Climate Drip Projects
For a distributor or contractor sourcing fittings for a cold-climate landscape project, three procurement criteria matter more than catalog pricing: published maximum operating pressure, hose ID compatibility, and material certification for outdoor use.
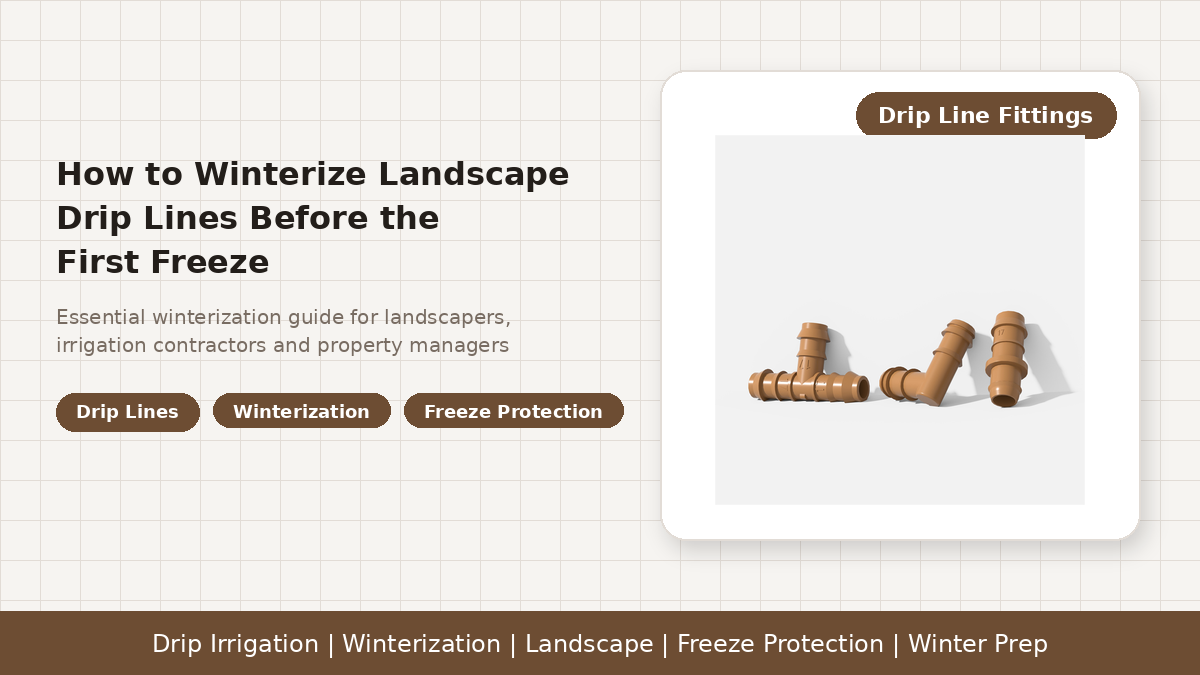
For the mainstream 17mm dripline format (the dominant commercial barb size in landscape irrigation), the operating specification that defines the upper bound is the maximum recommended system pressure without clamps. For the INOVATO 17mm Super Fittings product line, that published maximum is 3.45 bar (50 PSI), with a matching acceptable hose inside-diameter range of 14.2 mm to 15.2 mm. The product line covers insert couplings, adapters, tees, elbows, crosses, grommet elbows, MPT adapters and elbows in 1/2" and 3/4", FM threaded tees, a three-way fitting, and 17mm plug fittings. Sourcing the full range from one supplier reduces field-connection mismatches, itself a winterization risk because a mismatched barb-and-tube combination is the most common cause of barb blow-off.
For projects above 17mm (sports-field submains), lock-nut fittings with PN16 to PN25 ratings are standard; for projects below 17mm (small residential planters), 4mm and 6mm barbs have lower published pressure ratings, so winterization air pressure must drop further. This is a frequent source of over-pressurization damage on small residential sites.
For projects that must align with US federal irrigation efficiency programs, the US EPA WaterSense program provides audit and labeling guidance that cross-references landscape irrigation winterization as a recurring best-management practice. For international projects where pipeline pressure classes follow ISO conventions rather than US PSI conventions, the ISO 7268 standard for PN (pressure nominal) designation is the cross-reference for selecting PN10, PN16, and PN25 fittings against published maximum system pressures. For projects in climates with documented extreme-winter design temperatures, the International Commission on Irrigation and Drainage (ICID) maintains a public dataset on regional freeze-risk design parameters that distributors can use to right-size the insulation and blow-out approach.
 17mm Super Fittings - the commercial-grade barb family that defines the upper air-pressure limit for drip-line winterization. Published maximum system pressure without clamps: 3.45 bar (50 PSI); accepted hose inside-diameter range: 14.2 mm to 15.2 mm. Browse the full range at INOVATO Super Fittings.
The Bottom Line
Winterizing a landscape drip system is a 30-minute-to-six-hour procedure that turns a four-figure spring repair risk into a near-zero winter carryover. The four stages, drain, isolate, protect, verify, follow one non-negotiable rule: the lowest-pressure-rated fitting class installed sets the upper air-pressure limit for any blow-out step. Crews that run the procedure on the first forecast-freeze morning, and document it, will see fewer spring callbacks.
For commercial landscape projects, the procurement specification that minimizes winterization risk is straightforward: select the fitting class that matches the dripline size, source the full range of inserts, tees, elbows, and adapters from one supplier, and record the published maximum operating pressure for each fitting on the as-built drawing.