


A mixed flower bed is a small puzzle. Petunias want water every warm afternoon. Lavender would rather not see a drop all summer. Tulip bulbs, dormant by July, rot in soil that stays wet. Most home gardeners solve that puzzle by accident — they put everything on one drip zone and then spend the season watching one end of the bed wilt while the other end sulks in mud. The fix is mechanical, not horticultural: a mini ball valve for drip irrigation, one per zone, at a small manifold near the tap. That single piece of hardware turns one shared circuit into as many independent circuits as the garden actually needs.
This guide is for the gardener ready to build the right system. It draws on two decades of manufacturing at INOVATO, the microirrigation guidance published by the University of Florida IFAS Extension and the Irrigation Association, and the design principles in our Dripline System Layout Guide.
Why Seasonal Flower Beds Need Their Own Drip Zones
Three things go wrong when a mixed planting shares one drip circuit. Water need diverges fast: a petunia in July pulls three to four times the water of a sedum, and a dormant daffodil bulb wants zero. Soil texture diverges just as fast — a sandy annual bed drains in an afternoon while a clay perennial bed holds water for days. Exposure diverges as well, and the same volume lands very differently on the south-facing and north-facing sides of the same house.
Putting all of that under one valve forces a single runtime. Whatever you set, some bed is over-watered and some bed is under-watered, every single week of the season. The Irrigation Association and most state extension services describe this as the single biggest water-management failure in home landscapes — not bad emitters, not the wrong pressure, but simply too few zones.
We have walked gardens where the owner watered a dry border every morning for two seasons, and the only reason it stayed dry was that the same valve was already over-watering a wet border a few steps away. The hardware that would have fixed the problem cost less than the dead lavender it replaced. That is the case for a mini ball valve manifold, and it is the line we build.
The fix is simple. The University of Florida IFAS Extension notes that microirrigation, when installed and used correctly, exceeds 90% application efficiency — most water reaches the root zone rather than evaporating from a spray. The hidden cost of a single-zone garden is not the system itself; it is running the system as if every plant had the same thirst. We have seen this in field after field: the difference shows up in the plants, not the emitter numbers.
What Is a Mini Ball Valve for Drip Irrigation?
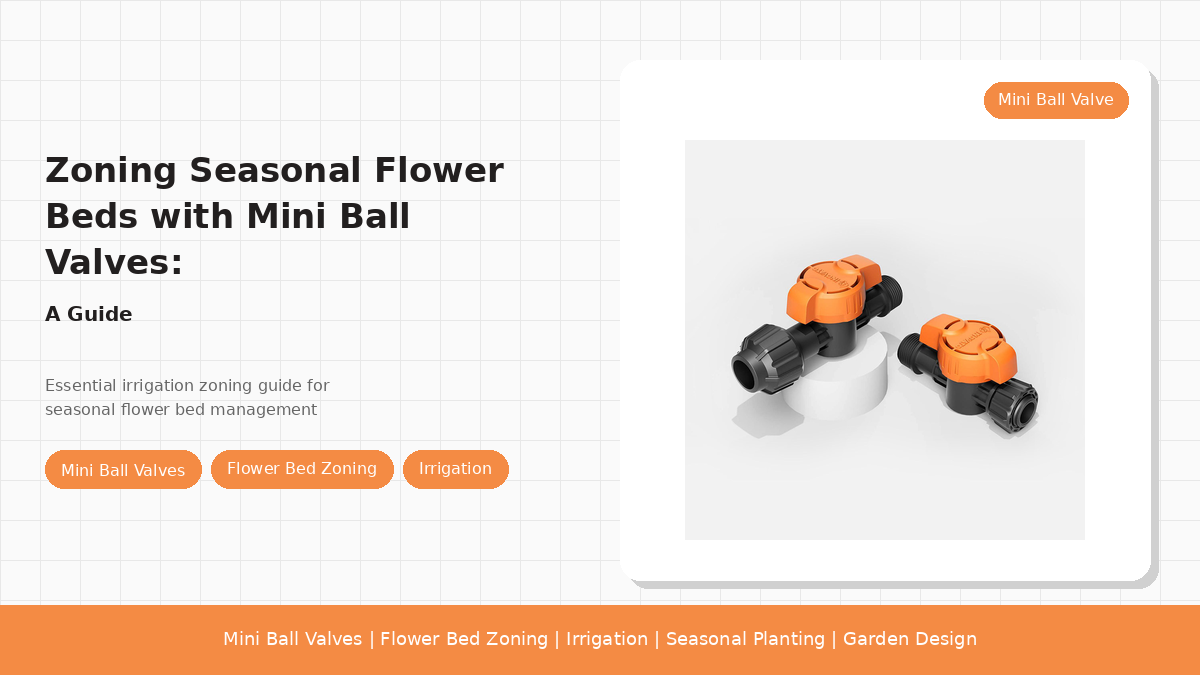
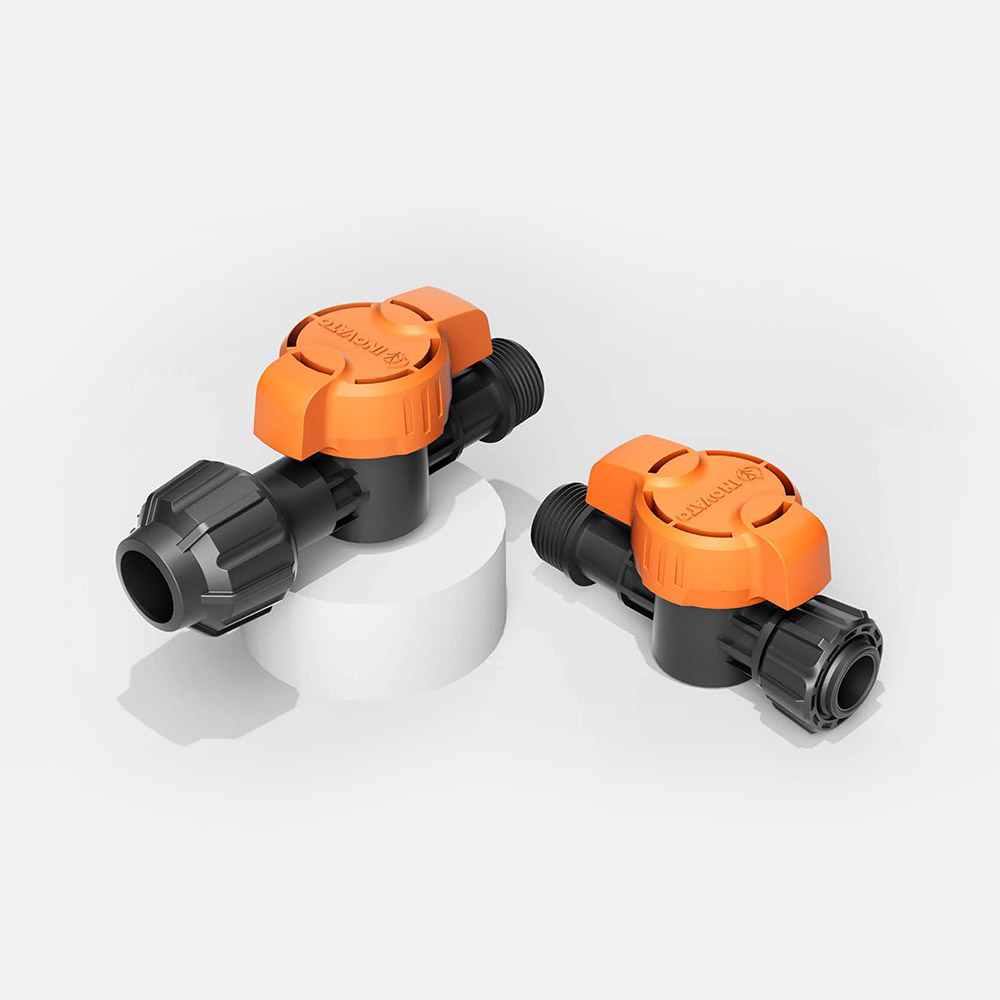
A mini ball valve is a compact quarter-turn valve with a spherical closure element (the "ball") that has a hole drilled through it. Turn the handle 90° one way and the bore lines up with the flow — water passes. Turn it the other way and the bore sits perpendicular — water stops. That simple binary action is what makes it so well suited to drip manifolds, where each zone is either running or not.
For drip work, "mini" means the valve is sized for the small pipe diameters used in residential landscapes rather than the larger diameters of household plumbing. INOVATO's Lucky Orange Mini Valve range, for example, comes in six configurations that cover every common drip geometry:
| Model code | Geometry | Typical use |
|---|---|---|
| CMVPM160040 | 16 mm barbed × 1/2" male thread | Single lateral off a 1/2" manifold outlet — the standard residential dripline hookup |
| CMVPM200060 | 20 mm barbed × 3/4" male thread | 20 mm dripline off a 3/4" manifold outlet — common on larger beds and lightweight PE laterals |
| CMVPP200200 | 20 mm barbed × 20 mm barbed | Inline shutoff on a 20 mm run, used to isolate one section of a longer lateral |
| CMVPP250250 | 25 mm barbed × 25 mm barbed | Inline shutoff on a 25 mm main or header — for larger property laterals |
| CMVPP2200200 | Double barbed off-take, 20 mm × 20 mm | Saddle tee into a 20 mm line to feed a drip lateral at any point |
| CMVPP2250250 | Double barbed off-take, 25 mm × 25 mm | Saddle tee into a 25 mm line — the same job, on the larger pipe size |
Three properties matter most for seasonal flower beds. The valve seats positively in both positions, so a closed zone does not seep onto dormant bulbs. The handle is large enough to operate by hand with wet gloves. The barbed or threaded outlet matches standard drip fittings you already own — no special tools, adapters, or committed ecosystem. We have refined these properties across six model variants and twenty years of production.
How to Group Flower Beds into Hydrozones
The single design decision that decides whether your zone build will work or not is how you group the beds. Walk the garden with a notebook. For each bed, write down the dominant plant type, the soil texture, and the sun exposure. Then group beds that share all three — that is a hydrozone.
You will almost always end up with four to six hydrozones in a typical home garden. Two beds of the same plant in different exposures are the same hydrozone; two adjacent beds of different plants in the same exposure are different hydrozones. The gardens that fail hardest are the ones where the owner grouped beds by visual layout and then wondered why the back border never dried out.
Annuals and Vegetables
High water need. Long daily runtimes in midsummer. Almost always the largest hydrozone by flow demand because the plants are shallow-rooted and the soil is often amended and fast-draining. This is the zone that justifies the highest-flow emitters (2 L/h or 4 L/h) and the longest daily runtime.
Perennials and Shrubs
Moderate water need. Deep but less frequent watering — the goal is to push moisture past the top 20 cm so roots chase it downward. Once established, many perennials tolerate a surprising dry-down between cycles; over-watering is a bigger killer than under-watering for this group.
Bulbs and Drought-Tolerant Beds
Low water need, with a sharp seasonal flip — heavy in spring growth and flowering, then bone dry in summer dormancy. Putting bulbs on the same zone as annuals is the single most common cause of "the bulbs rotted" complaints in home gardens. A separate zone lets you simply shut the valve in mid-June and walk away.
How to Install Mini Ball Valves at the Manifold (5 Steps)
What follows is the same build we use when we set up small gardens for our distributor network. It assumes a single 25 mm or 32 mm PVC header coming off the tap, four to six zone outlets, and the INOVATO mini ball valves from the model fit table above. The whole assembly takes under an hour once the header is in place.
Step 1 — Plan the Zones
Confirm your hydrozone list. Decide which beds share a valve (same plant, same exposure, same soil). Decide the order of valves on the manifold — left to right usually matches left to right in the garden. Write the zone name on masking tape stuck to each valve handle before plumbing; it is much harder to label a valve once it is hidden behind a shrub. We label ours in two places — handle and manifold body — because one label always fades faster.
Step 2 — Mount the Manifold
Fix the 25 mm or 32 mm PVC header to a wall, fence post, or stake near the water source. Cap one end. Fit a threaded union at the inlet side so the entire manifold can be unscrewed and removed for winter storage in cold climates. Keep the manifold above the highest outlet point in the system so the header drains back when the master valve closes.
Step 3 — Tap the Outlets
Drill outlet holes at the spacing that matches your zone count, then glue in a barbed tee threaded outlet for each zone. Wrap every male thread with two layers of PTFE tape before hand-tightening the outlet into the tee — One of the small leaks that ruins a manifold always traces back to skipped thread tape -- we have rebuilt manifolds in the field where the only defect was a single missing wrap.
Step 4 — Install the Mini Ball Valves
Screw one mini ball valve onto each outlet. Use the 16 × 1/2" valve for 16 mm dripline; use the 20 × 3/4" valve for 20 mm dripline or 1/2" PE laterals. Hand-tighten plus a quarter turn with a strap wrench — never a pipe wrench on the plastic body, which will crack the valve. Confirm the handle turns freely; if it feels stiff, the valve is misaligned, back off a quarter turn and reseat.
Step 5 — Pressure-Test and Label
Open the master valve, close every mini valve, then open one zone at a time and walk the bed looking for leaks at every emitter and at every fitting. Look for the tell-tale "wet spot that should not be wet." When the bed is clean, label each handle with a permanent marker or a weatherproof engraved tag. Close every valve when you finish — leaving a new manifold with all valves open is the single most common cause of an unintentional flood on day one.
Seasonal Watering Schedules by Bed Type
The point of separating zones is not to add complexity; it is to remove guesswork. Once each bed has its own valve, the seasonal schedule becomes obvious. The table below summarises how the three most common flower-bed hydrozones behave across a temperate year — adjust up or down by climate. We compiled it from extension-service guidance and our own distributor feedback across seventy-plus countries.
| Bed type | Spring (Mar–May) | Summer (Jun–Aug) | Autumn (Sep–Nov) | Winter (Dec–Feb) |
|---|---|---|---|---|
| Annuals and vegetables | Light daily, building with temperature | Daily, longest runtime of the year | Reduce as nights cool | Off (empty bed or cover crop) |
| Perennials and shrubs | Twice weekly as growth starts | Twice weekly, deep soakings | Weekly until first hard frost | Off in cold climates; minimal in mild |
| Bulbs and drought-tolerant | Heaviest cycle of the year (foliage and bloom) | Shut the valve off — dormancy | Light only if autumn-planted | Off |
The reason the EPA WaterSense program promotes drip irrigation in mixed landscapes is not that drip is fancier than sprinklers. It is that drip gives the gardener the granularity to do exactly this kind of zone-by-zone seasonal adjustment without buying a smart controller. A handful of mini ball valves and a sharp seasonal eye will outperform most automatic setups in a small mixed garden, because the human is the controller and the human is paying attention. We have seen this pattern across our distributor feedback in seventy-plus markets -- manual zoning with mini ball valves, done consistently, beats forgotten timers in nearly every case.
Maintenance: Winterization and Valve Care
Mini ball valves are mechanical devices with one moving part, which is why they tolerate outdoor service so well. The maintenance is correspondingly light, but it is not zero. We have service records on our first-generation valves that are now into their tenth year outdoors, and the only common replacement part has been the occasional handle retainer, not the valve body itself.
End of season, before the first hard frost: shut off the supply at the master valve, open every mini ball valve to drain the laterals, then leave each valve in the half-open position so any water still inside can expand without cracking the body. In climates where the temperature stays below freezing for extended stretches, either insulate the manifold with a foam cover or dig the assembly in below the local frost line. In mild climates, leave the manifold in place and simply drain.
Twice a season, more often if your source water carries sediment: cycle every valve through ten full open–close operations while the system is pressurised. The motion keeps mineral deposits from cementing the ball in one position and lets you feel any valve starting to stiffen. A stiff handle is almost always cured by working the valve back and forth — it does not mean the valve needs replacing. In hard-water areas we have seen valves seize after three years without cycling, and a ten-cycle workout brought every one back.
Annually: check the barbed connections at the manifold outlets for the first sign of weeping, and refresh the PTFE tape on any threaded connection that has been removed and reinstalled. A five-minute walk around the manifold once a year is the entire maintenance commitment -- and it is one we recommend setting on the calendar at the same time as the spring startup.
Frequently Asked Questions
Can one mini ball valve replace a solenoid valve in a flower bed drip system?
For residential gardens with a small number of zones — typically under six — that you can walk to and operate by hand, yes. A manual mini ball valve performs the same on/off function as a solenoid at a much lower component cost and with no controller, wiring, or power supply. For larger properties, oddly shaped beds, or any setup where you want automatic scheduling from a tap timer or smart controller, a solenoid valve remains the practical choice, because manual operation becomes a chore at scale.
What size mini ball valve fits 16 mm dripline?
A 16 mm dripline (sometimes labeled 1/2" in North American retail listings) pairs with a single-barbed male-threaded mini valve whose barbed end is 16 mm and whose threaded end is 1/2" BSP or NPT depending on region. The CMVPM160040 from the INOVATO Lucky Orange Mini Valve range is built exactly to that geometry and accepts 16 mm PE or PVC dripline directly without a separate insert adapter.
How many drip zones can one manifold serve?
A practical residential manifold built around mini ball valves supports 4 to 8 zones from a single 25 mm or 32 mm header, which covers most home gardens. Beyond 8 zones the header gets crowded and pressure differences between the first and last outlet become noticeable; split into two manifolds or move to a multi-station solenoid setup.
Do I need a separate filter before the mini ball valves?
Yes. A 130- to 200-mesh (about 100 to 75 micron) screen filter or disc filter upstream of the manifold protects every valve seat and every emitter downstream from sediment that will otherwise shorten valve life and clog drippers. Place the filter between the backflow preventer (or anti-siphon valve) and the manifold inlet, and clean it once per season.
Can I leave mini ball valves outside over winter?
Yes, provided the system has been winterized. After the last growing cycle, shut off the supply, open every mini ball valve to drain the laterals, then leave each valve in the half-open position so any remaining water can expand without cracking the body. In regions where temperatures stay below freezing for extended periods, insulate above-ground manifolds with a foam cover, or bury the manifold below the local frost line.
How do I group flower beds into zones — by plant type or by location?
Group by water need (the hydrozone principle), not by visual layout. Petunias on the sunny side and petunias on the shady side are the same hydrozone. A lavender border next to a vegetable plot is a different zone, because lavender wants far less water than vegetables. The Irrigation Association and most extension services call this the single biggest water-management decision in a mixed landscape.
What is the typical flow rate through a 16 mm dripline zone?
A 16 mm dripline with 2 L/h emitters spaced every 30 cm delivers roughly 1.6 to 2.0 L/min per 10 meters of run, depending on actual pressure at the emitter. A typical annual flower bed of 6 to 10 m² fits comfortably inside one zone on a 25 mm manifold. For larger beds, split the bed into two parallel laterals off the same valve rather than extending a single lateral past about 30 meters.
Closing Thoughts
A mini ball valve for drip irrigation is the kind of component you forget about once it is installed, which is the highest compliment any irrigation hardware can earn. It sits at the manifold, turns when you turn it, and turns mixed plantings into independent hydrozones. For seasonal flower beds — annuals, perennials, and bulbs all wanting different schedules — that independence is the whole point. We have spent twenty-plus years refining the line so the gardener can spend the next twenty barely thinking about the manifold.
Spec the right mini ball valve for your manifold
INOVATO has manufactured irrigation components — the Lucky Orange Mini Valve and the broader Mini Valve product line — for more than twenty years, with distributor coverage in over seventy countries.
Send us your zone count, your dripline diameter, and your connection preference (barbed, threaded, or layflat) and we will quote a fitting that drops into your manifold with no special adapters.
View the Lucky Orange Mini Valve →